WiFiアクセスポイントに特化して運用している、 OpenWrt トラベルルータGL-iNet GL-AR750Sに tailscale VPN を導入。Subnet Router機能で拠点丸ごと接続させたり、Exit-nodeを有効にして ジオブロック 回避のゲートウェイにしました。
OpenWrtへのtailscale導入
今回tailscaleを導入するのは前回、Home Assistantとは別拠点でWiFiアクセスポイント専用として稼働しているGL-iNet GL-AR750S Slateです。
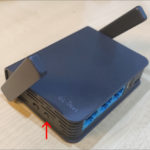
元々入っていたメーカー謹製ファームウェアから、素のOpenWrt v22.03へ入れ替え済みです。
|
1 2 3 4 5 6 7 8 9 10 11 12 13 14 15 16 17 18 19 20 21 |
root@GL-AR750SA7:~# uname -a Linux GL-AR750SA7 5.10.176 #0 Thu Apr 27 20:28:15 2023 mips GNU/Linux root@GL-AR750SA7:~# cat /etc/os-release NAME="OpenWrt" VERSION="22.03.5" ID="openwrt" ID_LIKE="lede openwrt" PRETTY_NAME="OpenWrt 22.03.5" VERSION_ID="22.03.5" HOME_URL="https://openwrt.org/" BUG_URL="https://bugs.openwrt.org/" SUPPORT_URL="https://forum.openwrt.org/" BUILD_ID="r20134-5f15225c1e" OPENWRT_BOARD="ath79/nand" OPENWRT_ARCH="mips_24kc" OPENWRT_TAINTS="" OPENWRT_DEVICE_MANUFACTURER="OpenWrt" OPENWRT_DEVICE_MANUFACTURER_URL="https://openwrt.org/" OPENWRT_DEVICE_PRODUCT="Generic" OPENWRT_DEVICE_REVISION="v0" OPENWRT_RELEASE="OpenWrt 22.03.5 r20134-5f15225c1e" |
OpenWrtへのtailscale導入は、OpenWrt側より導入ガイドが公開されており、基本的に次の2つのパッケージをインストールするだけ。
|
1 2 3 |
# opkg update # opkg install tailscale # opkg install iptables-nft |
|
1 2 3 4 5 6 7 8 9 10 11 12 13 14 15 16 17 18 19 20 21 22 23 24 25 26 27 28 29 30 31 32 33 34 35 36 37 38 39 40 41 42 43 44 45 46 47 48 49 50 51 |
root@GL-AR750SA7:~# opkg update root@GL-AR750SA7:~# opkg install tailscale Installing tailscale (1.32.3-1) to root... Downloading https://downloads.openwrt.org/releases/22.03.5/packages/mips_24kc/packages/tailscale_1.32.3-1_mips_24kc.ipk Installing kmod-tun (5.10.176-1) to root... Downloading https://downloads.openwrt.org/releases/22.03.5/targets/ath79/nand/packages/kmod-tun_5.10.176-1_mips_24kc.ipk Installing tailscaled (1.32.3-1) to root... Downloading https://downloads.openwrt.org/releases/22.03.5/packages/mips_24kc/packages/tailscaled_1.32.3-1_mips_24kc.ipk Configuring kmod-tun. Configuring tailscaled. logtail started Program starting: v1.32.3-1 (OpenWrt), Go 1.19.13: []string{"/usr/sbin/tailscaled", "--cleanup"} LogID: 14c44e9f84fcaa9ede834381f1e1de7c53e797a06272c52b6de9f5fa097bc645 logpolicy: using UserCacheDir, "/root/.cache/Tailscale" logpolicy.ConfigFromFile /root/.cache/Tailscale/tailscaled.log.conf: open /root/.cache/Tailscale/tailscaled.log.conf: no such file or directory logpolicy.Config.Validate for /root/.cache/Tailscale/tailscaled.log.conf: config is nil dns: [rc=unknown ret=direct] dns: using *dns.directManager flushing log. logger closing down logtail: upload: log upload of 468 bytes compressed failed: Post "https://log.tailscale.io/c/tailnode.log.tailscale.io/085643f54d8eab280b38f2a64b59a1f218392f3d5a733702b67a10b8d6402675": context canceled Configuring tailscale. root@GL-AR750SA7:~# opkg install iptables-nft Installing iptables-nft (1.8.7-7) to root... Downloading https://downloads.openwrt.org/releases/22.03.5/targets/ath79/nand/packages/iptables-nft_1.8.7-7_mips_24kc.ipk Installing kmod-nf-ipt (5.10.176-1) to root... Downloading https://downloads.openwrt.org/releases/22.03.5/targets/ath79/nand/packages/kmod-nf-ipt_5.10.176-1_mips_24kc.ipk Installing kmod-ipt-core (5.10.176-1) to root... Downloading https://downloads.openwrt.org/releases/22.03.5/targets/ath79/nand/packages/kmod-ipt-core_5.10.176-1_mips_24kc.ipk Installing libxtables12 (1.8.7-7) to root... Downloading https://downloads.openwrt.org/releases/22.03.5/targets/ath79/nand/packages/libxtables12_1.8.7-7_mips_24kc.ipk Installing libiptext0 (1.8.7-7) to root... Downloading https://downloads.openwrt.org/releases/22.03.5/targets/ath79/nand/packages/libiptext0_1.8.7-7_mips_24kc.ipk Installing libiptext6-0 (1.8.7-7) to root... Downloading https://downloads.openwrt.org/releases/22.03.5/targets/ath79/nand/packages/libiptext6-0_1.8.7-7_mips_24kc.ipk Installing libiptext-nft0 (1.8.7-7) to root... Downloading https://downloads.openwrt.org/releases/22.03.5/targets/ath79/nand/packages/libiptext-nft0_1.8.7-7_mips_24kc.ipk Installing kmod-nft-compat (5.10.176-1) to root... Downloading https://downloads.openwrt.org/releases/22.03.5/targets/ath79/nand/packages/kmod-nft-compat_5.10.176-1_mips_24kc.ipk Installing xtables-nft (1.8.7-7) to root... Downloading https://downloads.openwrt.org/releases/22.03.5/targets/ath79/nand/packages/xtables-nft_1.8.7-7_mips_24kc.ipk Configuring kmod-nf-ipt. Configuring kmod-nft-compat. Configuring libxtables12. Configuring libiptext0.Configuring kmod-ipt-core. Configuring libiptext6-0. Configuring libiptext-nft0. Configuring xtables-nft. Configuring iptables-nft. |
tailscaleサービスが動いているのを確認したら、初回接続をリクエストして認証URLを得ます。
|
1 2 3 4 5 6 7 |
root@GL-AR750SA7:~# service tailscale status running root@GL-AR750SA7:~# tailscale up --netfilter-mode=off Warning: netfilter=off; configure iptables yourself. To authenticate, visit: https://login.tailscale.com/a/bb########### |
コピーした認証URLをブラウザで開き直し、tailscaleに登録しているGoogleアカウントでログイン。

図01.tailscaleログイン
Connect ボタンを押してインスタンスをtailnetに繋げます。
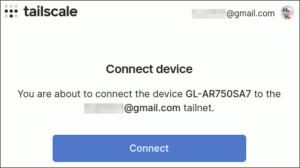
図02.tailnetへインスタンスを接続
tailscale admin consoleページに、このOpenWrtデバイスが現れました。

図03.tailscaleデバイス一覧
単にこのデバイスをtailscaleへ繋げるだけでよければ、作業はこれだけです。
tailscale用仮想インターフェイスの作成
ローカルサブネットを丸ごとtailnetへ繋げるSubnet Router機能や、他のtailscaleデバイスが外向きゲートウェイとして利用できるExit-node機能を利用するには、以前OpenWrtにWireguard VPNを導入した時のような、仮想インターフェイスの作成とゾーン定義が必要になります。
まず、OpenWrtのWebUIの Network → Interfaces を開き、 Add new interface ボタンを押下。

図04.インターフェイス一覧
tailscaleパッケージインストール時に作成されたデバイス、 tailscale0 と紐付いた tailscale インターフェイスを作成。

図05.新規インターフェイス作成
設定はまだ反映せず、このままファイアウォールゾーンの設定へ移ります。

図06.追加されたインターフェイス
この作業で、 /etc/config/network に以下の項目が追加されました。
|
1 2 3 |
config interface 'tailscale' option proto 'none' option device 'tailscale0' |
ファイアウォールゾーンの設定
次に、 Network → Firewall へ移動してファイアウォールゾーンを設定します。ここは以前、APモードした時にファイアウォールを撤廃していたので、ご覧の通り空っぽです。

図07.空のファイアウォールゾーン
まず一つ目、 lan ゾーンを作成。

図08.lanゾーンの作成
続いて、作成した tailscale インターフェイスと紐付いた tailscale ゾーンを作成。ここでは、 Masquerading と MSS clamping にチェックを入れ、 lan ゾーンとの通信を許可します。

図09.tailscaleゾーンの作成
組み上がったゾーン設定は次の通り。ここで設定を反映させます。

図10.ファイアウォールゾーン設定後
/etc/config/firewall に追加されたのは、以下のとおり。
|
1 2 3 4 5 6 7 8 9 10 11 12 13 14 15 16 17 18 19 20 21 22 23 |
config zone option name 'lan' option input 'ACCEPT' option output 'ACCEPT' option forward 'ACCEPT' list network 'lan' config zone option name 'tailscale' option input 'ACCEPT' option output 'ACCEPT' option forward 'ACCEPT' option masq '1' option mtu_fix '1' list network 'tailscale' config forwarding option src 'tailscale' option dest 'lan' config forwarding option src 'lan' option dest 'tailscale' |
Subnet RouterとExit-nodeの有効化
tailscaleのためのインターフェイスとゾーン設定が終わったので、Subnet RouterとExit-nodeを有効にするオプションを添えて接続します。
|
1 2 |
root@GL-AR750SA7:~# tailscale up --netfilter-mode=off --advertise-routes=192.168.1.0/24 --accept-routes --advertise-exit-node Warning: netfilter=off; configure iptables yourself. |
次にtailscale admin console上で、提案されたSubnet RoutesやExit-nodeを承認します。

図11.tailscale Edit route settings
接続に問題がないことを確認したら、以降はデバイスの起動後自動接続されるよう、スタートアップスクリプト /etc/rc.local に記述しておきます。

図12.スタートアップスクリプトに記述
|
1 2 3 4 5 |
# Put your custom commands here that should be executed once # the system init finished. By default this file does nothing. ntpd -q -p hk.pool.ntp.org tailscale up --netfilter-mode=off --advertise-routes=192.168.1.0/24 --accept-routes --advertise-exit-node exit 0 |
光ルータに静的ルート設定
仕上げにこの拠点のデフォルトゲートウェイを担う光ルータPR-600MI(関連記事はこちら)に、tailnet向きトラフィックの静的ルートを作成しておきます( 192.168.1.251 がこのOpenWrtデバイスのIPアドレス)。

図13.光ルータ静的ルート設定
ちなみに他の静的ルートも、別のOpenWrtデバイスによるVPN用です。
Exit nodeを使ったジオブロック回避
Androidスマートフォンのtailscaleアプリを開き、右上のメニューから Use exit node をタップ、Exit nodeを有効にしたGL-AR750Sを選択すると、Exit nodeが有効になります。

図14.Android端末からExit-node利用
香港からtailnetを介し、このOpenWrtデバイスのある日本経由でインターネットへ出ることで、ジオブロックが設定されているサイトへもアクセスできるようになりました(東京ガスのmyTOKYO GASは本来、日本国外からアクセス不能)。

図15香港からジオブロック回避テスト

