Oracle Cloud Infrastructureの無料枠で稼働している、Ubuntuインスタンスへの tailscale VPN を導入は他のLinuxと同じも、Oracle Cloudの仮想ネットワークへの手立てが必要でした。
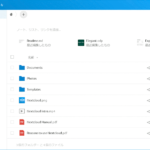
Oracle CloudのNextCloudインスタンス
以前、Oracle Cloudの無料枠を駆使して構築した自分用NextCloudサーバ(Ubuntu 20.04ベース)は、その後もアイドルインスタンス回収されそうになったりもしましたが、今でも息災です。
今回はクラウド上のこのインスタンスにtailscaleを入れて、インスタンスの監視はもとより、Exit-nodeにすることでジオブロック(地域制限)アクセス回避用のゲートウェイに仕立てます。
以下、Oracle Cloud上の仮想マシンへの導入方法に特化された、tailscaleのKBに沿って作業を進めます。
Ubuntuインスタンスへのtailscaleインストール
前回の記事でUbuntu 18.04実機へインストールした際は、Linux汎用のインストールスクリプトを使いましたが、
|
1 |
$ curl -fsSL https://tailscale.com/install.sh | sh |
今回は手作業でレポジトリを追加してみることに。
|
1 2 3 4 5 6 7 8 |
~$ curl -fsSL https://pkgs.tailscale.com/stable/ubuntu/focal.noarmor.gpg | sudo tee /usr/share/keyrings/tailscale-archive-keyring.gpg >/dev/null ~$ curl -fsSL https://pkgs.tailscale.com/stable/ubuntu/focal.tailscale-keyring.list | sudo tee /etc/apt/sources.list.d/tailscale.list # Tailscale packages for ubuntu focal deb [signed-by=/usr/share/keyrings/tailscale-archive-keyring.gpg] https://pkgs.tailscale.com/stable/ubuntu focal main ~$ cat /etc/apt/sources.list.d/tailscale.list # Tailscale packages for ubuntu focal deb [signed-by=/usr/share/keyrings/tailscale-archive-keyring.gpg] https://pkgs.tailscale.com/stable/ubuntu focal main |
apt パッケージマネージャを更新の上、tailscaleをインストール。
|
1 2 3 4 5 6 7 8 9 10 11 12 13 14 15 16 17 18 19 20 21 22 23 24 25 26 27 28 29 30 31 32 33 34 35 36 37 38 39 40 41 |
~$ sudo apt update Get:1 http://repo.netdata.cloud/repos/edge/ubuntu focal/ InRelease [1,294 B] Hit:2 http://repo.netdata.cloud/repos/repoconfig/ubuntu focal/ InRelease Hit:3 http://ports.ubuntu.com/ubuntu-ports focal-security InRelease Hit:4 http://ap-osaka-1-ad-1.clouds.ports.ubuntu.com/ubuntu-ports focal InRelease Get:6 http://repo.netdata.cloud/repos/edge/ubuntu focal/ Packages [91.1 kB] Get:7 http://ap-osaka-1-ad-1.clouds.ports.ubuntu.com/ubuntu-ports focal-updates InRelease [114 kB] Get:8 https://pkgs.tailscale.com/stable/ubuntu focal InRelease Get:9 https://pkgs.tailscale.com/stable/ubuntu focal/main all Packages [354 B] Hit:5 https://packagecloud.io/ookla/speedtest-cli/ubuntu focal InRelease Get:10 https://pkgs.tailscale.com/stable/ubuntu focal/main arm64 Packages [10.2 kB] Hit:11 http://ap-osaka-1-ad-1.clouds.ports.ubuntu.com/ubuntu-ports focal-backports InRelease Get:12 http://ap-osaka-1-ad-1.clouds.ports.ubuntu.com/ubuntu-ports focal-updates/universe arm64 Packages [1,098 kB] Fetched 1,321 kB in 3s (390 kB/s) Reading package lists... Done Building dependency tree Reading state information... Done All packages are up to date. ~$ sudo apt install tailscale The following additional packages will be installed: tailscale-archive-keyring The following NEW packages will be installed: tailscale tailscale-archive-keyring 0 upgraded, 2 newly installed, 0 to remove and 2 not upgraded. Need to get 25.6 MB of archives. After this operation, 48.3 MB of additional disk space will be used. Do you want to continue? [Y/n] y Get:2 https://pkgs.tailscale.com/stable/ubuntu jammy/main all tailscale-archive-keyring all 1.35.181 [3,082 B] Get:1 https://pkgs.tailscale.com/stable/ubuntu jammy/main arm64 tailscale arm64 1.62.1 [25.6 MB] Fetched 25.6 MB in 2s (16.5 MB/s) Selecting previously unselected package tailscale. (Reading database ... 152203 files and directories currently installed.) Preparing to unpack .../tailscale_1.62.1_arm64.deb ... Unpacking tailscale (1.62.1) ... Selecting previously unselected package tailscale-archive-keyring. Preparing to unpack .../tailscale-archive-keyring_1.35.181_all.deb ... Unpacking tailscale-archive-keyring (1.35.181) ... Setting up tailscale-archive-keyring (1.35.181) ... Setting up tailscale (1.62.1) ... Created symlink /etc/systemd/system/multi-user.target.wants/tailscaled.service → /lib/systemd/system/tailscaled.service. |
tailscaleへの初回接続
tailscaleの初回接続を試行して認証URLを得ます。
|
1 2 3 4 |
~$ sudo tailscale up To authenticate, visit: https://login.tailscale.com/a/############### |
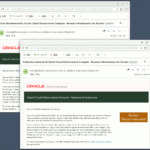
コピーした認証URLをブラウザで開き直し、tailscaleに登録しているGoogleアカウントでログイン。
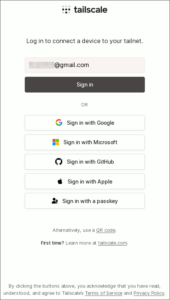
図01.tailscaleログイン
Connect ボタンを押してインスタンスをtailnetに繋げます。
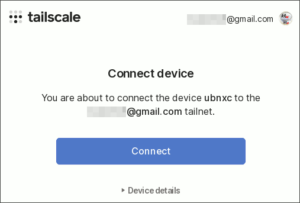
図02.tailnetへインスタンスを接続
tailscale admin consoleページにOracle Could上のインスタンスが現れました。

図03.tailscaleデバイス一覧
単にこのインスタンスをtailscaleへ繋げるだけであれば、作業はこれだけ。
Oracle Cloud仮想ネットワークへの穴開け
上述のKBによると、ファイアウォールの 41641/UDP に穴を開けておくとダイレクトアクセスが使えるようになり、パフォーマンス向上が見込まれるようなので、Oracle Couldの仮想ネットワーク内に施します。
まず、Oracle Cloud WebUIのメニューで、ネットワーキング内の仮想クラウドネットワーク(VCN)を開いて、既存のVCNをクリック。

図04.仮想クラウドネットワーク一覧
VCNの詳細のサブネット一覧に表示されているサブネットを確認。

図05.仮想クラウドネットワーク詳細
インスタンスがどのサブネットに属しているかは、インスタンスのVNICからも辿ることが可能です。

図06.インスタンスのVNIC
そのサブネットの詳細を開いて、セキュリティ・リストをクリック。

図07.サブネットのセキュリティリスト
イングレス・ルールの追加ボタンをクリック。

図08.セキュリティリストのイングレスルール
以下の要領で 41641/UDP のイングレス・ルールを新規追加します。

図09.新規イングレスルールの追加
Subnet RouterとExit-nodeの有効化
デバイスの属するサブネットを丸ごとtailscaleへ繋ぐSubnet Router機能や、外向きゲートウェイのように振る舞うことのできるExit-node機能を有効にするには、LinuxシステムにおいてIPフォワードを有効にする必要があります。
インスタンスのターミナルで、以下のようにしてIPフォワードを有効化します
|
1 2 3 4 5 6 7 8 9 |
~$ echo 'net.ipv4.ip_forward = 1' | sudo tee -a /etc/sysctl.d/99-tailscale.conf net.ipv4.ip_forward = 1 ~$ echo 'net.ipv6.conf.all.forwarding = 1' | sudo tee -a /etc/sysctl.d/99-tailscale.conf net.ipv6.conf.all.forwarding = 1 ~$ sudo sysctl -p /etc/sysctl.d/99-tailscale.conf net.ipv4.ip_forward = 1 net.ipv6.conf.all.forwarding = 1 |
その上で、KBを参考に tailscale up のオプションを次のように確定。
|
1 |
~$ sudo tailscale up --advertise-routes=10.0.0.0/24,169.254.169.254/32 --accept-routes --accept-dns=false |
実際にSubnet RouterやExit-nodeを利用するには、tailscale admin console上のルーティング設定でチェックを入れて、承認する必要があります。
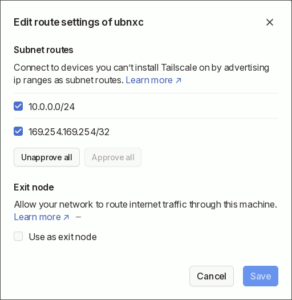
図10.tailscaleデバイスのルーティング設定
ただ、Oracle Cloudの無料枠では、外向きトラフィックが1TB/月までと聞いているので、Exit-nodeは必要なときにチェックを入れるようにしています。
また、Oracle Cloudの内部DNSを oraclevcn.com の名前解決に限定したSplit DNSとして設定はしましたが、普段FQDNで読み出したりしていないので、恩恵は限定的。
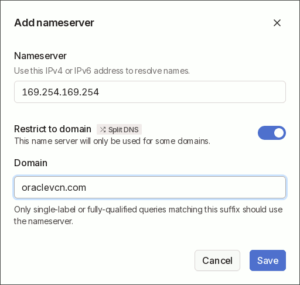
図11.tailscale Split DNSの追加


いいね!
あざっす!